I am often asked how we update and get projects done so quickly around here.
First of all, I laugh because it reminds me of pregnancy…. it seems to go faster for all those not involved in the actual carrying of the baby. But when you are the person involved, it can be messier, a test of patience, and may require more flexibility than originally expected. Here’s how we turned our Master bath into a Cozy Cottage/Farmhouse Suite in just a few months with a tight timeline and on budget.
I have found if we are working on a timeline it helps the project move faster. A great example is that time we had a graduation open house where 300 people were invited and we decided to quickly finish the master bath. It seemed like a good idea to finish it before the event. Not that anyone was going to be showering in here for that, but knowing we had a deadline helped keep us on track.
The Transformation to the Cottage/Farmhouse look
After We bought our fixer-upper 5 years ago we worked like crazy in the first 6 months to get the main level done. Walls and cabinets were painted, new walls built, other walls torn down, new flooring placed, lights and drywall patched. It seemed never ending. But the one room we set aside to finish later was our bed and bath suite. It was an 80’s beauty but in 2017 it was in need of some major updates.
As I walk through a house I can pretty quickly give you an analysis of how I feel the spaces could be decorated according to the feel of the house. When I walked through this house with the lower ceilings and smaller rooms, I knew we were going to go for a cottage style here. Which was no problem for me since that’s my favorite cozy look.
How we think through Budget on Remodel Projects
When we update a home or build new we try to think not only of the now but what would sell in 5 -10 years from now. We have learned that if we want to be trendy in a decision we must weigh what it will cost to replace that down the road. Obviously, everything dates itself but we try to stay more traditional on Spendy, and more difficult to change items like siding, kitchen cabinets, and appliances. And then I bring in trends through paint, flooring, lighting, and hardware. This allows a house to feel current without having everything dating in a decade.
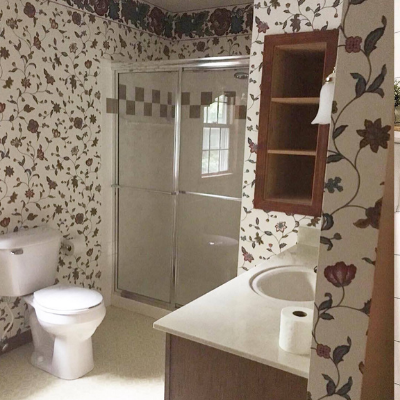
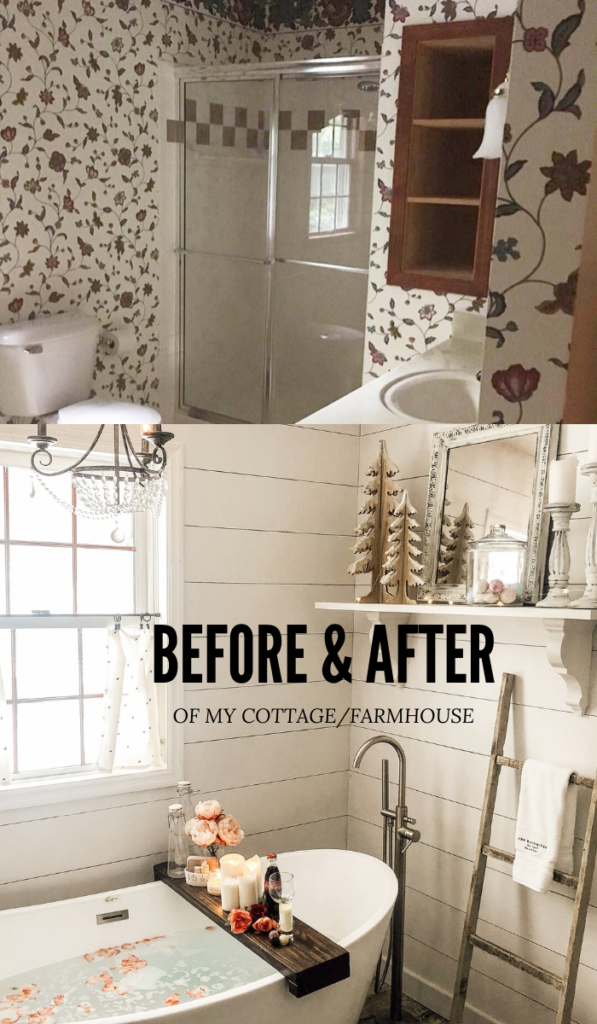
The Master bath “before”
I liked the 80’s and I would have probably thought this was super cute wallpaper at the time, in fact, I may have put some of this same style up in my dining room. 🙂 But not anymore. The wallpaper needed to come down. The Problem was, I was tired of stripping off wallpaper. So we decided to just cover it up with some good ole shiplap.
How we decide where to put our money in Remodel projects
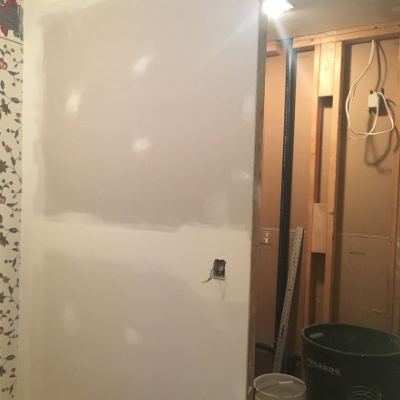
The size of this Bath was too small for a master suite. It needed to be expanded to include a larger closet as well. We know that Master Closets and bathrooms are super important for resale So we decided to use some of the space from the bedroom and incorporate it into the bathroom. Then we added a walk-in closet from an adjacent bedroom. I will share that in a future post.
Jason built a new wall taking out about 4 ft of the bedroom space for a double sink vanity and built new cabinets. We know with the size of our home and bedroom a 2 bowl sink, shower, tub, and hidden toilet are all going to be important to a future buyer.
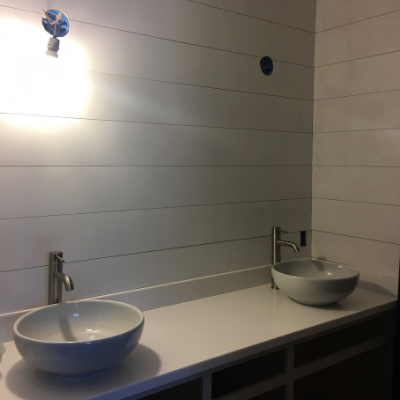
Shiplapped walls
You may wonder why we would shiplap all the walls. Well, remember that wallpaper in the previous picture? The entire bed and bath suite had floor to ceiling wallpaper on all walls. We decided instead of ripping all the wallpaper off, as we had in 7 other rooms of the house, we would just paint the paper and add shiplap over top. This will be one of those trends that we know will pass but it seemed like a great way to bring character and charm to the room without a lot of extra cost. We keep this cost down by making our own shiplap strips. For a fraction of the price of pre-made shiplap, we use 1/4′ underlayment. Jason ripped the boards down to size and nails them to the wall. I like a rough finish for a cottage/farmhouse look, so keeping it rough was exactly what I was going for.
Building a Walk-in Shower
Next, we added a wall where the old shower was located and incorporated the hall closet into the shower. This gave us the extras space we needed for both a shower and tub in the master. Again, thinking of where we wanted to spend money as we thought of the future. Because of our tight schedule, we hired the tile job out to a friend.
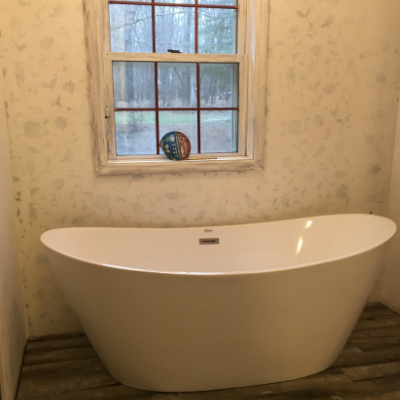
I Love Bathtub in a Master Bath
This was one of the things we knew we would want to incorporate into our bathroom. People seem to fall into 2 categories, those who love baths and those who hate them. I am definitely in the first category. I like showers too, but goodness there’s just nothing like soaking in a hot bubble bath!
We did something we had never done before, we ordered this tub through Amazon! You can find it here. Pretty sweet to have it delivered right to our door!! Also, it sat there not hooked up for a solid 3 months. Excruciating to the tub enthusiast who hadn’t had a bath in 3 years. 🙂
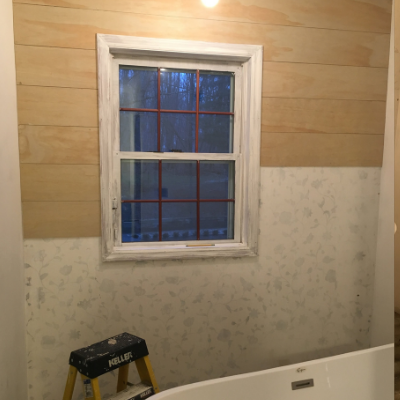
More Shiplap around the Tub
We added more shiplap to the tub area. Again using the ripped down 1/4′ underlayment from Lowes. After Jason nailed the shiplap to the wall I painted it with flat alabaster paint from Sherwin Williams. I like a low sheen finish on shiplap walls for the cottage/farmhouse look.
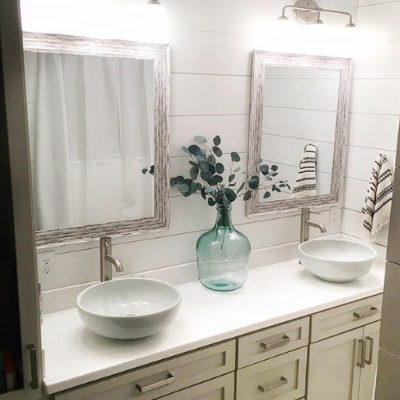
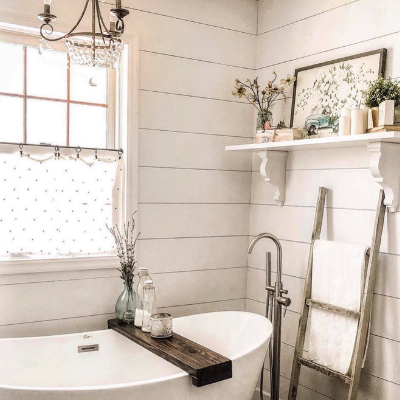
The “After” Makes it all worth it
When I’m in the middle of the mess I try to focus on the feeling I will have when this is all finished. Somehow it helps me endure till the end.
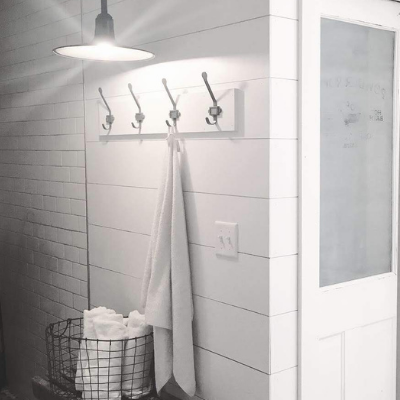
The light above the chandelier is from Lowes. The Board across the tub was a piece of scrap wood in our pile of extra wood in Jason’s workshop. We stained it and finished it with poly. I love having that tray not only for my bath essentials but it’s great for my coffee cup as well.
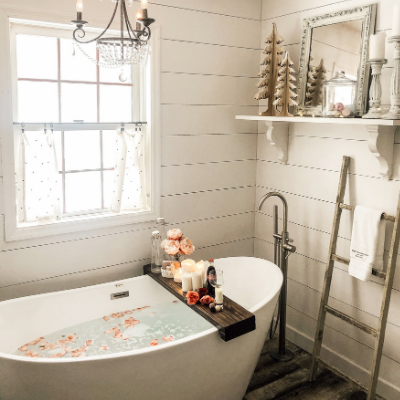
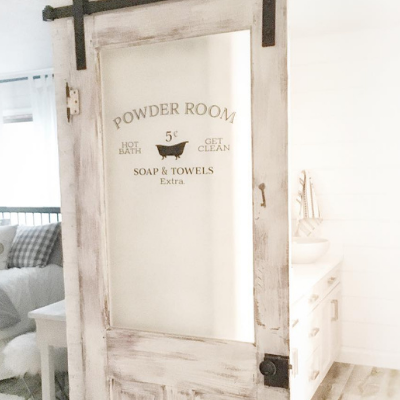
I love the shiplap craze Joanna Gains introduced to the world almost a decade ago… Shiplap and Subway tile. 🙂 I hope it never goes out. We added several vintage auction items here. An old bench, wire basket, farmhouse barn light, and sliding antique door all give this bathroom the cottage/farmhouse vibe I was going for.
3 years later
I still like my cottage/farmhouse bathroom. It’s not huge but it’s perfect for our needs. Sometimes you have to live in the mess but it’s so rewarding to realize the fruit of your labor was worth it in the end. When making decor decisions remember to get a feel for your space. Pin pictures for inspiration. And then Make it your own.
Other updates in our Fixer-upper
HOW TO CREATE A COFFEE BAR WITH LESS THAN $100
PIN INSPIRATION FOR LATER
LXJuDVIWNdeGYkF